

Nutanix CE
Nutanix Community Edition

iso 파일 준비
Nutanix CE(Community Edition) iso 파일 다운로드

Nutanix 배포
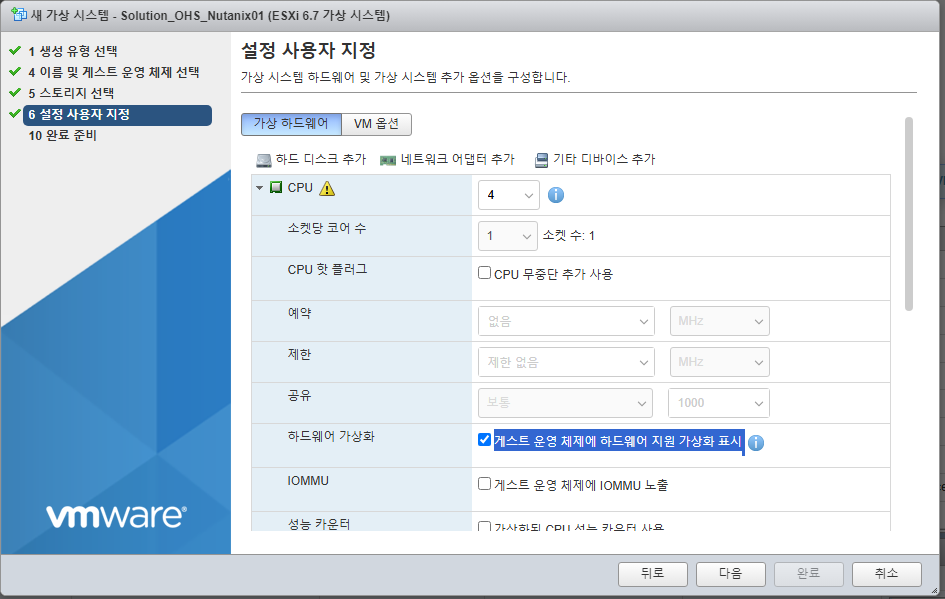
VM 생성
Linux / RHEL 8 선택

cpu 설정
하드웨어 가상화 활성화
Hard disk 추가
하드 디스크 3개 필요 (최소 용량 때문에 용량도 맞춰야 함)
1. 128 GB (Hypervisor Boot Disk)
2. 200 GB (CVM Boot Disk)
3. 500 GB (Data Disk)
디스크 프로비저닝 : 씬 프로비저닝
컨트롤러 위치
1. disk 1 : SCSI 컨트롤러 0 / SCSI (0:0)
1. disk 1 : SCSI 컨트롤러 0 / SCSI (0:1)
1. disk 1 : SCSI 컨트롤러 0 / SCSI (0:2)

VM 옵션 설정
부팅 옵션 > 펌웨어
BIOS 선택 (EFI로 할 거면 보안 체크 해제)

VM 옵션 > 고급 > 구성 매개변수 > 구성 편집

disk.EnableUUID = TRUE

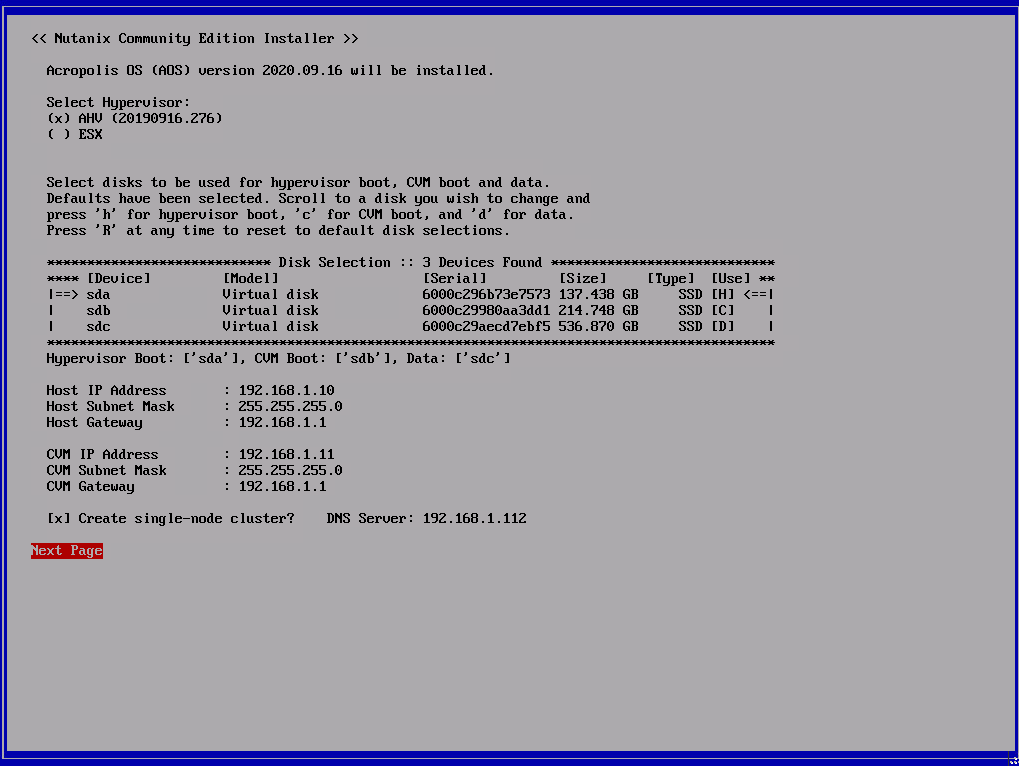
Nutanix Installer 설정
Hypervisor 선택
AHV (Nutanix의 Hypervisor) 선택
disk 1(128GB) : Hypervisor Boot Disk 설정 (키보드에서 H 입력)
disk 2(200GB) : CVM Boot Disk 설정 (키보드에서 C 입력)
disk 3(500GB) : Data Disk 설정 (키보드에서 D 입력)
Host network 입력
CVM (관리 VM) network 입력
VM 1개만 만들 거면 Create single-node Cluster 선택
EULA 동의
맨 아래까지 다 본 뒤에 I accept the end user license agreement 선택

Start 선택
설치 진행

Nutanix 접속
AHV 접속

AHV default password
user : root
password : nutanix/4u
CVM 접속
CVM은 바로 putty로 접속 못 하고 AHV에서 ssh로 접속해야한다

CVM default password
user : nutanix
password : nutanix/4u
CVM root 계정 passwd 지정
비밀번호 제한 때문에 Idpa_12345 하면 적용된다
sudo passwd root

Node 실행 확인
CVM에서 genesis status

(위의 사진처럼 노드 번호가 나오지 않으면 게시글 최하단의 에러 상황 확인)
클러스터 추가
다중 노드 : cluster -s <cvm_ip_1>,<cvm_ip_2>,<cvm_ip_3> --dns_servers 1.1.1.1 create
단일 노드 : cluster -s <cvm_ip> --redundancy_factor=1 --dns_servers 1.1.1.1 create
해당 환경은 단일노드이므로 다음 명령어 사용
cluster -s 192.168.1.11 --redundancy_factor=1 --dns_servers 192.168.1.112 create

클러스터 확인
cluster status
(zookeeper connect refuse 에러 뜨면 아래 에러 상황 확인)

클러스터 추가 후에 genesis status 재 입력 시 다음처럼 출력된다

genesis status 시 노드가 없는 에러 해결
cvm 접속 후
서비스 실행 확인 시 실행 중인 노드가 없는 것으로 나온다
genesis status

genesis start 하자 에러 발생

에러 로그
Not starting Genesis because config_home_dir script did not complete execution successfully. Look for errors in /tmp/config_home_dir.log.
Rerun the script as root or manually fix the issues and delete file /.config_home_dir_marker.
root 유저로 config_home_dir 스크립트 재수행하라는 에러 로그 (/tmp/config_home_dir.log 파일은 안에 내용이 없다)
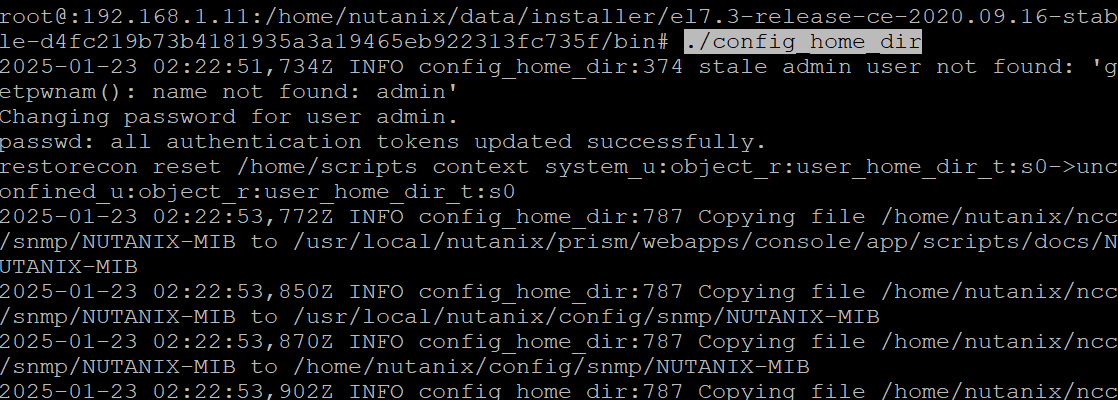
root 유저로 접속 후 config_home_dir 스크립트 찾기
su -
find / -name "config_home_dir"

cd /home/nutanix/data/installer/el7.3-release-ce-2020.09.16-stable-d4fc219b73b4181935a3a19465eb922313fc735f/bin/
./config_home_dir

에러 로그
2025-01-23 02:15:12,831Z ERROR config_home_dir:894 Failed to modify group account membership changes, ret 1, stdout , stderr usermod: existing lock file /etc/shadow.lock without a PID
usermod: cannot lock /etc/shadow; try again later.

2025-01-23 02:15:12,832Z CRITICAL config_home_dir:940 Could not update group accounts membership settings
usermod: cannot lock /etc/shadow; try again later.
/etc/shadow.lock 파일 찾기
ls -lsrt /etc | grep shadow

shadow.lock 파일 제거
(복사본 빼놓기)

다시 스크립트 수행하면 된다
/home/nutanix/data/installer/el7.3-release-ce-2020.09.16-stable-d4fc219b73b4181935a3a19465eb922313fc735f/bin/config_home_dir
이제 다시 nutanix 계정으로 접속 후 genesis를 켜면 된다
genesis start
genesis status

zookeeper 안 켜질 시 에러 해결
상황 파악
cluster start 시 zookeeper 연결 부분이 안 된다

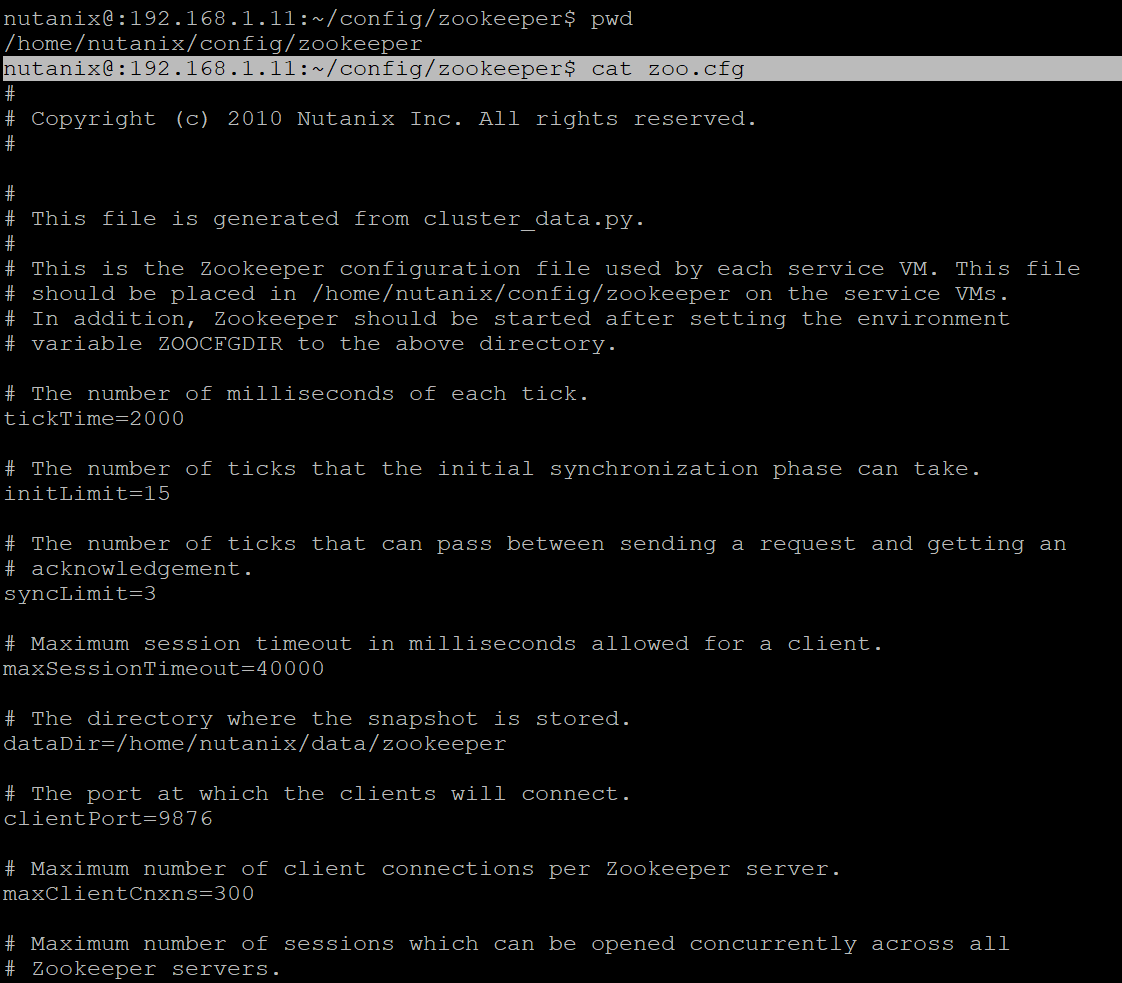
/home/nutanix/config/zookeeper/zoo.cfg 파일 확인
clientPort로 9876 사용 중
ps -ef | grep zookeeper
확인해도 없고
netstat -an | grep 9876
확인해도 안 나온다
문제 해결
sestatus 입력 시 selinux가 켜져 있다
selinux 끄기
(nutanix 계정이기 때문에 반드시 sudo 필요)

해결 완료
zookeeper 시작
zookeeper_init start
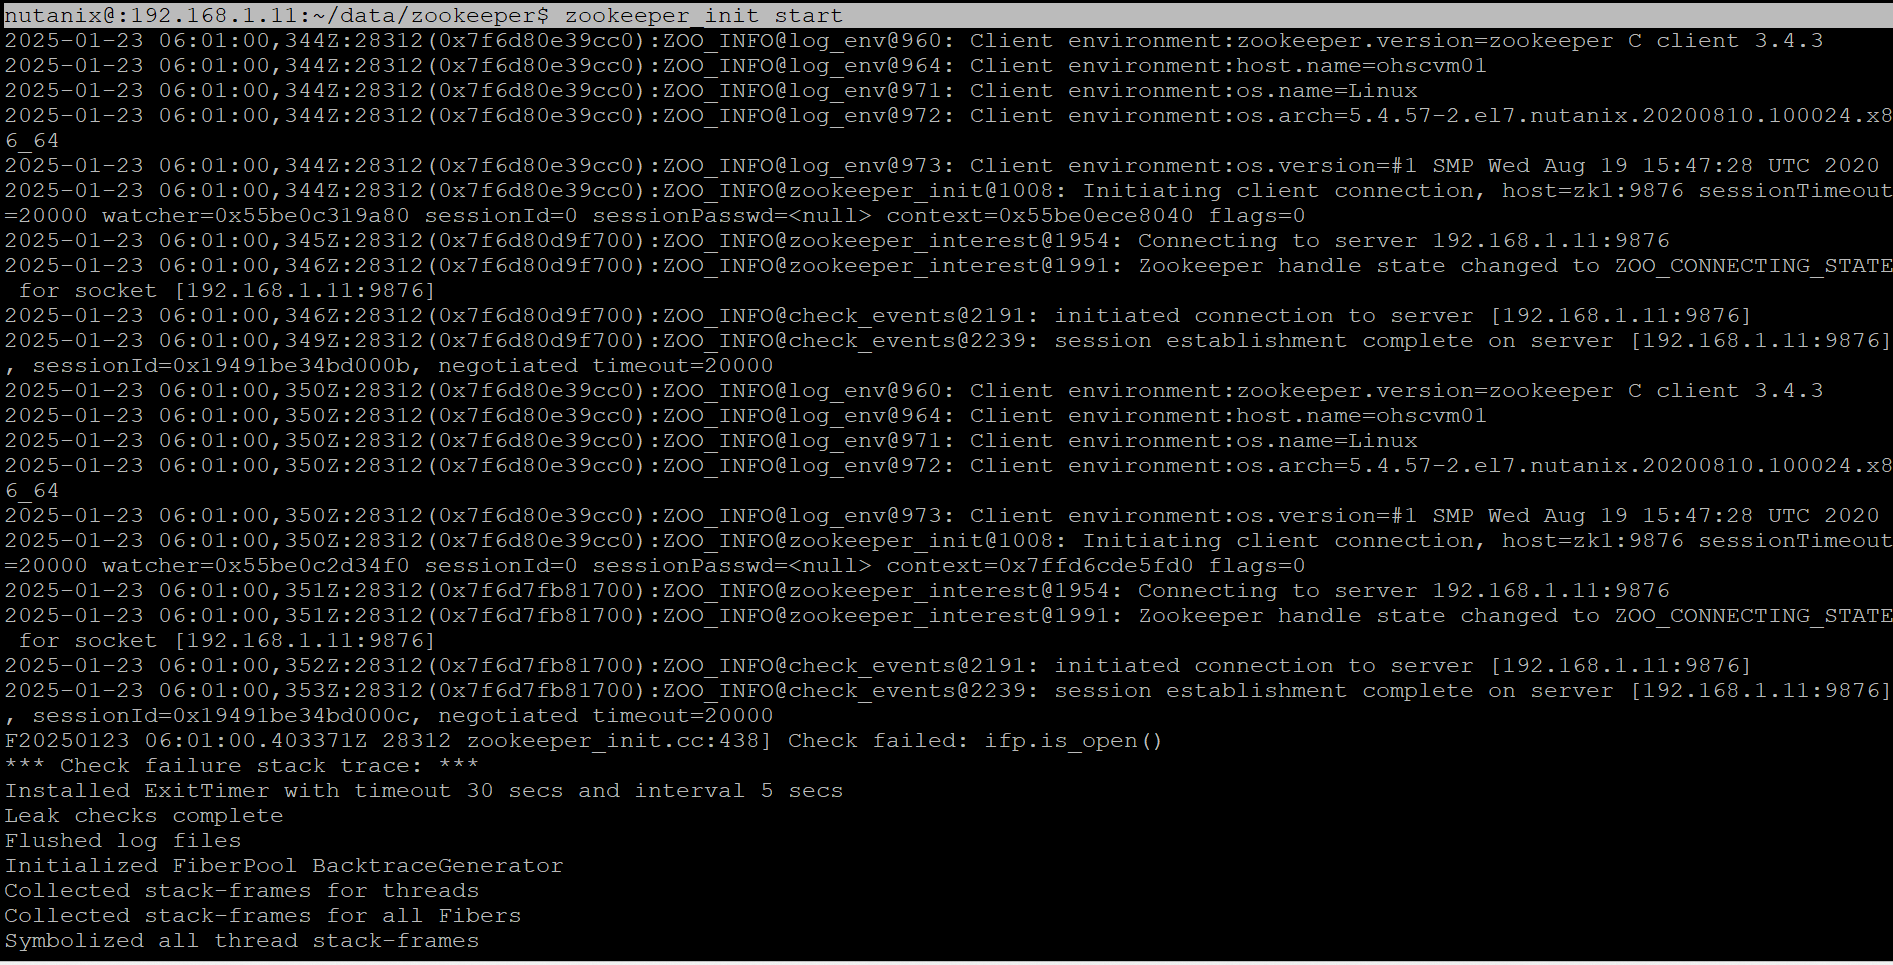
ps -ef | grep zookeeper 하면 나온다

netstat -ntlp | grep 9876
해도 이제 결과가 나온다

참고 : https://www.jeroentielen.nl/installing-nutanix-community-edition-ce-on-vmware-esxi-vsphere/
Installing Nutanix Community Edition (CE) on VMware ESXi/vSphere - Jeroen Tielen
This blog post explains how to install a three-node Nutanix cluster nested in VMware ESXi/vSphere. Requirements include IP addresses, memory, CPUs, and storage. Detailed steps on creating virtual machines, installing Nutanix CE, and checking cluster status
www.jeroentielen.nl
Nutanix Support & Insights
portal.nutanix.com