
ddboost 생성
DD에 SSH 접속
ddboost 생성
ddboost storage-unit create <ddboost 이름> user <OS user 이름>

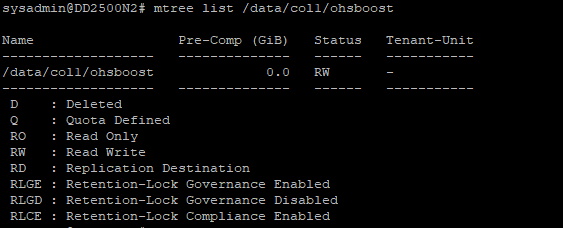
ddboost 목록
ddboost storage-unit show
ddboost storage-unit show <ddboost 이름>

ddboost를 생성하면 mtree도 자동으로 생성된다
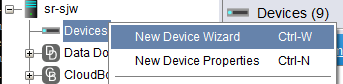
NMC 접속
Device 탭에서 New Device 생성
DataDomain (ddboost) 선택

DDBoost Credentials에 ddboost 생성 시 입력한 user의 name과 password 입력
Secure Multi-Tenancy에서 DD에서 생성한 storage-unit 선택

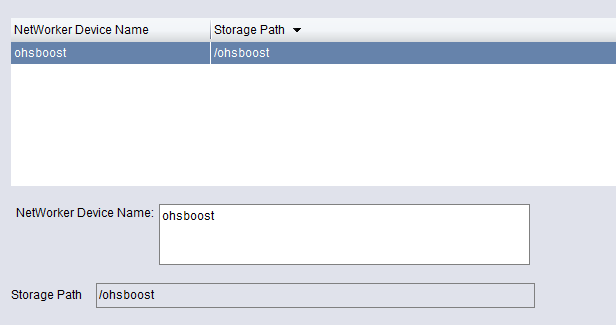
New Folder로 폴더 생성
폴더 이름은 알아보기 쉽게 ddboost의 이름과 통일
NetWorker Device Name은 NMC에 뜨는 해당 ddboost의 이름

Pool 생성을 선택하고 NMC에서 사용할 Pool 이름 입력
알아서 Pool과 Label이 생성된다

Storage Node는 Networker 서버에 설치된 것 사용

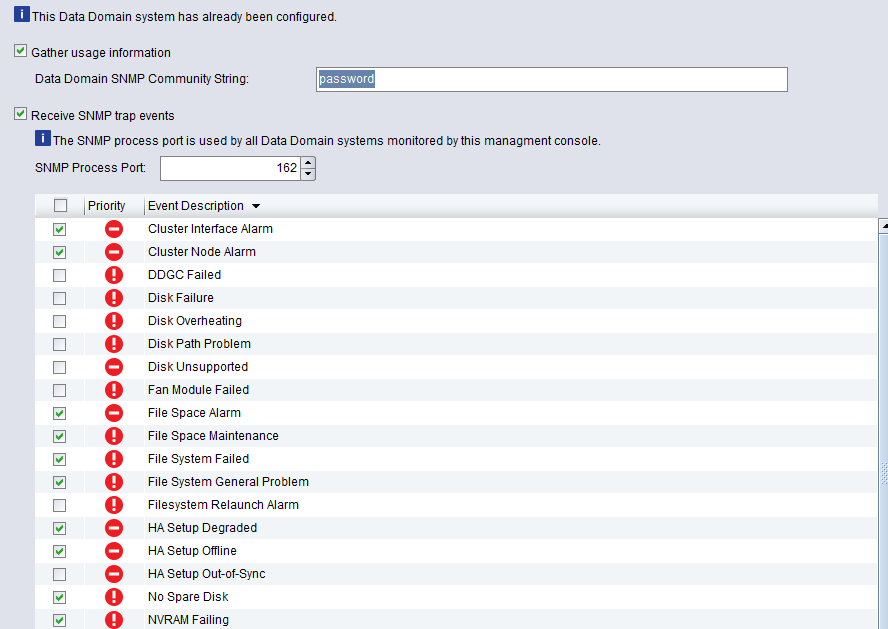
SNMP 설정은 해도 되고 안 해도 된다. (보통 안 한다)
SNMP Community String은 manager(Networker)와 Agent(아마도 다른 관제 프로그램?) 통신에 필요한 비밀번호
SNMP Process Port는 SNMP 통신을 위한 포트로, Manager는 보통 162, Agent는 보통 161을 사용하는 듯하다
생성완료

Media Pool과 Label이 자동으로 생성되어 있다


ddboost 삭제
Device 탭에서 unmount

Media 탭에서 Disk Volume 삭제


Media 탭에서 Media Pool 삭제
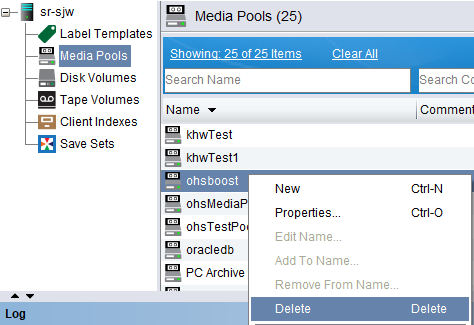
Media 탭에서 Label 삭제

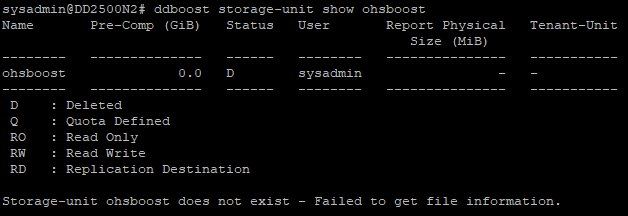
DD SSH에서 ddboost 제거

ddboost 상태 D로 변경
Cleaning 돌려주기

ddboost 삭제 완료

mtree로 삭제되어 있다

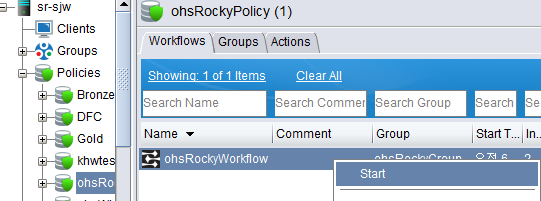
ddboost 백업 테스트 (GUI)
back up Policy를 설정할 때 Action의 Destination Pool에서 ddboost를 골라준다

수동 백업 진행
백업 완료


Disk에 저장된 백업 확인

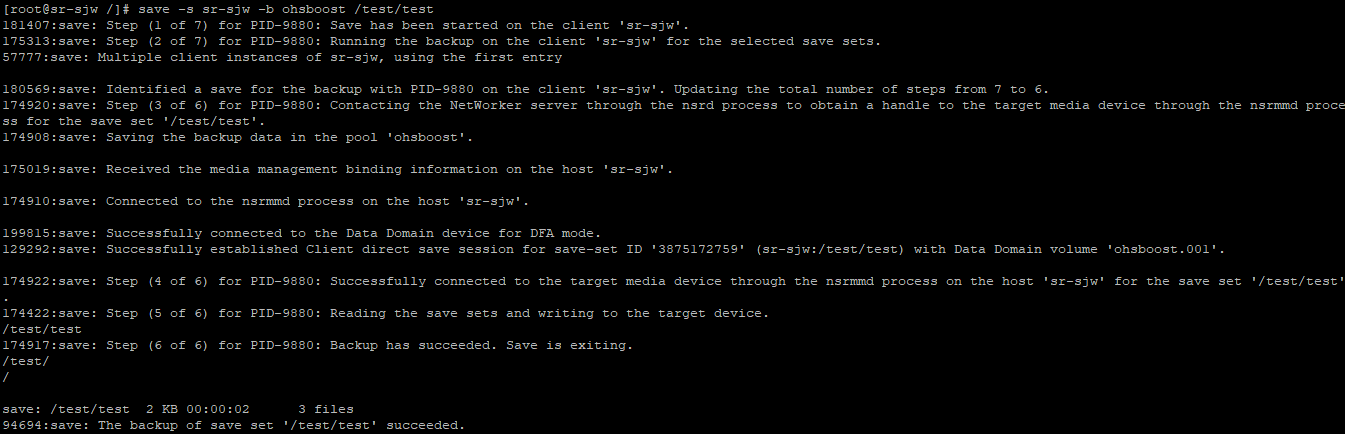
ddboost 백업 테스트 (CLI)
수동 백업
Networekr Server SSH 접속
save -s <서버> -b <Pool> <File>
save -s sr-sjw -b ohsboost /test/test
백업 내역 확인
mminfo -avot -q "savetime>=03/20/2024 02:12:00 PM"
24년 3월 20일 오후 2시 12분 이후의 백업 내역 확인
